Welcome!

With washing waiting to be folded and cereal in our hair we share our roller coaster lives to inspire, relate and communicate with Mums just like us.

All things family related food, recipes, reviews, gardening, crafts, educational play, home things, outings and more.

Hi! We're in the process of moving over to our new site. You can find our content here for now or check out the old and the brand NEW at www.mumstakefive.com


Showing posts with label Kids. Show all posts

Tuesday, November 19, 2013

Christmas Craft -Really quick and simple crafts for kids


Cute Reindeers

These cute little guys can be made to hang as ornaments from your Christmas tree, stuck up on the wall with some blue tack to create a little reindeer family OR stuck onto wrapped Christmas presents as a nice extra decoration.


For each reindeer you’ll need: 3 x pop sticks (plain, coloured, short, long – any kind you like!)
2 x googly eyes
1 x small pompom ball
1 x pipe cleaner
craft glue 

1.Glue two pop sticks together to make a ‘V’ shape.
2.Glue the googly eyes half way up each pop stick.
3.Curl the pipe cleaner around and around the centre of the third pop stick then bend the two ends of the pip cleaner to look like antlers.
4.Glue the third piece on, placing it above the eyes.
5.Glue the pompom ball to the bottom of the V to make a nose and leave it all to dry.

I showed Miss Two how to make the first reindeer, and then let her glue and stick all the other reindeer's together (with my guidance). She loved picking her own colours and being in charge of creating her reindeer's.
While she was busy picking and gluing the eyes on, I made the antlers as they were a little too difficult.

Tips: You can glue the pop sticks in advance if you have young children or if you’re unable to leave them in their position to dry.


Christmas Wands

These wands are the perfect accessory for your little ones Christmas costume, as the star on the top of your Christmas tree OR the kids can play with them as a magic Christmas wand.
For each wand you’ll need:
1 x polystyrene foam star (I got a mixed pack of 6 from Kmart for $3)
1 x stick
ribbon/s
red paint
glitter

1.Poke a hole in the foam star with the stick.
2.Put a bit of glue on the hole. Position your ribbon over the tip of the stick and push it back into the same hole. This is to keep the stick stable and secure the ribbon.
3.Let your child paint the star all over, turning it over to paint both sides.

4.Give them some glitter to sprinkle over their freshly painted star and then leave it to dry.

This has by far been the best Christmas craft I’ve made with Miss Two. It’s very quick easy to make and they look great. Best of all she loved making it and loves playing with it.
You can also to this idea with almost any foam shape you like, just add ribbon and paint!


Reindeer Muesli/Chocolate bars

My kids loved making these. 

You just need coloured Christmas paper, tape, pipecleaners, eyes, pom poms and glue and something to wrap. we used snack bars but you could use any tubular or rectangle packaged gift.

1. Wrap your item in the coloured paper like a present and tape together
2. Cut the pipe cleaner in half and tape to the back.
3. Glue the eyes and nose on.

Great little gift for classmates or friends.


Mistletoes


Other than getting the kids footprints in paint these are so easy and so cute.


Once you have your footprints and they have glue them to some thicker card of a different colour. It makes them stand out and makes them last a little longer.


Pop a hole in the top and thread a string or ribbon through the top. We used a pipecleaner. 


Tie a prettybow and glue or staple it to the top and its done! 


Do you make Christmas craft with your little one?


The Multitasking Mummy


Just incase you missed it, you may like our How to Bow like a Pro article.
Make your own ribbon bows and save heaps.

Tuesday, November 5, 2013

Christmas Foam Trees - Easy Toddler Craft


3D Christmas Tree Craft for Kids


Glitter Christmas Trees


You’ll need:
  • Small polystyrene foam cones (I got a pack of 6 from Kmart for $3)
  • Soft confetti or small/fine glitter
  • Craft glue or double sided sticky tape
  • Clear contact
  • White card or pre-cut paper stars
  • Scissors

Before you start this project with your child, make sure you have everything set-up. It’s best to prepare your foam cone with the craft glue OR double sided sticky tape before they begin so it’s nice and tacky, ready for sticking.

Put some the confetti/glitter into a tray to keep it all in the one place (and to minimise mess!). Your child can then roll the cone over and over again getting all the little pieces to stick to it, creating a lovely homemade Christmas decoration.
Once it’s dried it’s best to cover it in contact to keep all the little tiny pieces on there – you’ll definitely need to do this if you've used double sided sticky tape as they will drop off over time.

Cut out, or help your child to cut out a star for the top of the tree. You can also buy pre-cut stars for very little cost from most craft places.
Make a small cut at the top of the tree. With a touch of glue, stick a star in place.


Fuzzy Christmas Trees


You’ll need:
  • Small polystyrene foam cones
  • 20+ pipe cleaners for a cone
  • White card or pre-cut paper stars

*This is a little tricky for the younger ones and I had to do most of it with Miss Two but she still helped by choosing the colours and poking them in the foam.

Start by poking the end of the pipe cleaner in one part of the foam and with tension, tightly wrap it around the cone then push the end tip into the foam to secure it. Continue this until you can’t see anymore of the foam.
Make a small cut at the top of the tree. With a touch of glue, stick a star in place.


We have a few foam cones left so our next attempt is going to be a lolly and a chocolate Christmas tree!
What other creative ideas can you think of to make these cones festive for Christmas?  


Tuesday is IBOT link up day with Jess http://essentiallyjess.com/


Monday, September 23, 2013

Dinosaurs Garden - Fun Holiday Activity


Looking for something fun to do one day my five year old loved making this and still months later goes out and plays with it.  Most of the plants survived being moved around a few times and are starting to sprout and grow. Everyone who visits seems to like it and can't help themselves and move a dinosaur around. 


You'll need :


  • A base.  we used the largest flower pot base we could find and then just drilled a couple of holes in it.  You could use any sort of plastic storage container, litter box, baking tray. 

  • Potting mix or soil. 

  • Environment items like rocks and we used an old branch broken up. We also used a smaller flower pot saucer for a lake.

  • Plants.  Succulents are best as they don't really mind being snapped off and planted somewhere else.  We had a variety at our place already but if you don't maybe a neighbour wouldn't mind you having a piece of theirs? 

  • Some dinosaurs we had a collection already but you can buy small packs of dinosaurs from most department stores or variety stores.   You don't need to use dinosaurs how about fairies, Lego men or army men.  Any of those little figurine type things. 


Friday, August 23, 2013

Baby Sleepytime Bath Review and Giveaway!


I am always on the lookout for good quality, natural bath products that are easy to find. The Brauers Naturals Baby range of products is fantastic and it’s all available at my local supermarket, so I’m one happy mummy!
We've been test driving the Baby Sleepytime Bath for the last month and I’m really happy with it. The kids are noticeably calmer when we’ve used it, going to bed is a lot smoother and the solid sleep has definitely improved. Mister 10 months loves his baths and when I use the Baby Sleepytime Bath product he has a great night sleep … so I’ve started using it every night, who wouldn’t!
What I personally love the most about this product is that it cleanses and moisturisers and is gently on Miss 2’s skin. She suffers from Eczema and before I would have to bath her in just plain water, now she is happy for me to use the Baby Sleepytime Bath and it doesn't affect her skin.  
What Miss2 loves most about this product – the bonus rubber duckie that comes with it of course.


About this product:
  • No nasties: free of petrochemicals
  • Soap free
  • Only pure, natural ingredients
  • Gentle on sensitive skin
  • Eczma-friendly
  • Softly scented
You can view the whole Brauer Naturals Baby Bath and Skin Care Range here. They list the entire range, directions, pricing and ingredients.


This product is a dream come true to for us. We love it, we'd love you to give it a try. It would also make a great gift for someone having a baby (as all mothers know how sleep depriving that first year+ can be).


Brauer is giving 3 of our lucky readers the chance to win a full sized Sleepytime Bath product worth $11.49! It includes the bonus rubber duckie.


All you have to do is enter via the box below. 
"Like" Brauer facebook page and the Mums Take Five facebook page.
Bonus entries for answering our easy question 


Saturday, August 3, 2013

Plum Pie in the sun, I spy EVERYONE! – Easy Plum Pie Recipe


"Each Peach Pear Plum", this is a favourite book from my childhood. I bought it to share with Miss 2 and because I still enjoy reading it, she enjoys hearing it. 

It also inspired what I planned to serve for dessert, Plum Pie!


There are a few different things you can do with this idea. I made a large pie, mini pies and even served star shaped shortcrust with dip (the plum filling).


You’ll need:
  • 600g tinned plums
  • 1 cup of caster sugar
  • Pinch of salt
  • 1/3 cup plain flour
  • 1 tsp vanilla essence
  • 1 sheet shortcrust pastry
  • 1 sweet pie base
  • 1 egg white


Preparation:
Pre-heat your oven, 160 degrees for fan forced, 180 degrees for conventional.
Precook your pie base until it’s just golden and then set it aside. Place your sheet of shortcrust pastry out to defrost on a flat surface.


Make the pie filling:
Strain the juice from the plums straight into a pot.
Remove the plums and cut them into quarters, removing the seeds as you go.
Put the plums aside for now.


Mix together the dry ingredients (sugar, flour and salt) then pour it into the pot of plum juice.
Stir it together over a medium heat until the mixture has thickened.
Remove from the heat, add the plums and vanilla essence and gently mix it all together.


Assemble:
Pour the plum filling into the pie base and be careful not to over fill it.
Cover the top of the pie with the sheet of shortcrust pastry.
Trim the excess pastry by running a knife along the edge.
Use a folk to press around the edge to seal it.
Brush your egg white over the top.
You can use the left over pastry cut-offs to make mini pies or cut out shapes. Do this by needing the pastry together then rolling it out flat.


Pop your pie in the oven on 160 degrees for approximately 30 minutes. Be careful when pulling your pie out or this can happen….


I'd LOVE to show you an amazing finished plum pie with a big slice and a dollop of fresh cream on the side… but alas, reality happened and I dropped my ‘masterpiece’ on the kitchen bench.
I wasn't going to put this in but I thought I might give you all a little chuckle and show that these things happen to all of us!


How about some "Green Eggs and Ham"?  see that recipe Here!


Wednesday, July 31, 2013

Themed Collage - Craft for Todders

Themed Collage – Craft for your Toddler


This was Miss 2’s afternoon activity. She had a tray of cut-outs from her current favourite book - Goldilocks and the Three Bears, and a window of clear contact where she can stick her cut-outs anywhere she pleases, all by herself!
Creating new things on their own can boost a child’s self-confidence and help them develop new skills they didn’t know they had. Miss 2 loved doing this and was very proud of the end result. It is now on the wall in her bedroom.


You will need:
  • Clear contact
  • Sticky tap
  • Scissors
  • An old book or book cover
  • A tray for the cut-outs
  • *optional confetti, glitter or sequins


You will need to pre-cut the pictures/text. Depending on how many you cut, it can take a little while so best to do it when your toddler is preoccupied or during nap time.

Find a low window (or use the sliding door) so they will be able to reach all areas. Cut two sheets of clear contact roughly the same size as each other. Peal the backing off one of them and sticky tape the corers to secure it to the window.


When Miss 2 was ready for action I explained to her that the clear paper on the window was sticky and I got her to touch it so she knew what I meant.  I told her that she can put her pictures anywhere she liked on there but once she put it down it was stuck. She carefully placed each piece (even if some were upside down) all by herself.
*This helps build fine motor skills and encourages imagination.


When she was finished I took it down and gave Miss 2 some confetti glitter to sprinkle in the gaps. Of course she loved doing this and it was rather messy but it was another good lesson for her. Getting messy with glitter and seeing how things stick together to create a picture is all part of early learning experiences and helps build a child’s knowledge base.

When she was fished making a wonderful mess I added to it by shaking off the excess confetti. I then covered the whole picture with the second piece of clear contact. I folded the sticky ends over and trimmed any bits that stuck out or looked too rough.
That’s it! It’s ready to be put up on Miss 2’s wall.


You can do this activity with anything; pictures of family members, strips of scrap paper, cards from their last birthday… anything you like!


What do you think your child would like to make a collage of?


Monday, July 15, 2013

Stardust Circus - Sydney July 2013 Review

Stardust Circus 
A Sydney show review by Nic

My daughter has recently become obsessed with watching Dumbo, the 1941 Disney classic. As most toddlers/children do, she watches it over and over again. If you don’t know/remember the story; Dumbo is a baby elephant who is born into the circus. There’s a fare bit of circus events and stunts in the movie. So I asked her if she’d like to go to a real circus with me one day, “Oh yes Mummy!” she replied with an extremely over enthusiastic voice. So I typed into Google ‘circus Sydney’ and lucky us, there was a circus here now, the Stardust Circus was in town!

 Very excited, I left 45 minutes early with Miss 2 and Mister 8 months (Hubby was working) to allow myself all the extra time I seem to need now that Miss 2 is toilet training and Mister 8 months has just started teething and throw in the fact that I’m new to Sydney and haven’t been to this place before. I’m glad I did because there was a teacup ride, jumping castle slide and a mini sideshow alley for us to explore!
They also have a show bag for $10, some different flashing light toys for sale as you walk into the tent, standard fun show food and a coffee stand.
The show went for 2 hours, starting just after 11am and finishing at about 1:15pm including an intermission.
I won’t ruin the show for you but you will see some of the following: Lions, pony’s, dogs, pigs etc... Performing perfect tricks! Crazy, funny clowns with some good adult and children jokes, an awesome mix of music both during and in-between performances, people from as young as a 1 year old (yes he’s only 1 and he’s gorgeous!) through to adults doing some serious stunts and showing us great skills! There is an opportunity to have your photo taken with a baby lion cub for $40 before the show and at half time the kids can ride a pony around the circus ring for a small fee.
My daughter loved the clowns the most and I have to say I enjoyed anything the young acrobats were involved in - so cute and so talented!
This is a show I’m glad I didn't miss and lucky us we‘ll be going with another family next week!


The Stardust Circus website is easy and you can buy tickets from there with a $5.50 booking fee, but that way when you arrive you can just show them the print out, give them your booking number, or like me – just give them your surname while you juggle two kids! I also pre-purchased a $5 souvenir program as a keepsake and to show Hubby as it was the kids’ first circus experience.


Tips:
  • Bring cash. If you think you’ll want to buy food, toys, let the kids go on the rides or play the sideshow games then bring extra cash as there are no card facilities.
  • Plan where you think you’ll park before you leave. I don’t recommend parking right out front like we did as it becomes a traffic jam quickly before and after the shows and we were parked in.
  • Get there early. Allow time to get a parking spot, walk to the show, have kids go to the toilet and line up (OR buy your tickets then line up *they don’t take credit cards).
  • I brought my own snacks and bought some there. Bring your own if you want to save money and have a healthy option. It can also help to keep the kids still in their seats to watch the show and avoid lining up in the half time break.
  • You can bring a pram and leave it just inside the tent entrance before heading to your seats. I wish I did, I need more than 2 arms.

For information and to purchase tickets go to their website:  http://www.stardustcircus.com.au/

*We sat in the Elevated Chairs which was $30 per adult, $20 per child (no charge for a child who can sit on your lap for 2 hours). It wasn’t a sell out show so the last three rows at the back were empty. Just before the show started I moved us up the back so we could spread out a bit more. A few people did the same – especially the ones with toddlers who wanted to get out of their chairs and move around a bit.


Note:  This is simply a review of OUR experience. We were not asked, reimbursed, paid or anything else from Stardust for this review.  All words are our own.  thanks.

Wednesday, July 3, 2013

Little Bellies Review and Giveaway


I don’t think I’m an overly strict mumma who only lets their children eat particular foods and I’m not a nutritionist or expert on snack foods but I do more than often by pass the snack and lunch box foods in the supermarkets for my own home made options or good ol’ fruit.  I have however found a brand I am loving and i'm so excited to tell you about them and even better we're lucky enough to have a giveaway on them! 

"little bellies" is an Australian Family Owned company who are trying to keep their kids and ours in  Organically certified healthier snack food options. 
I had the privilege of spending the morning with some of the"little bellies" family recently and trying their great range of healthier food options aimed at younger Children. 
 My little Miss also loved trying all the products and checking its throwing and eating off the floor suitability. Honestly I was surprised of how many products she actually enjoyed and the foods I thought she’d avoid are now on my permanent shopping list.


We love the Little Gingerbread Men made with whole-grains and sweetened only with grape juice, there are no added preservatives and no artificial colours or flavours. They are a little bigger than some smallish teddy bears you can buy which i find great because the little ones can hold them better and they tend to eat less of them as they bite them rather than guzzle them whole.
I've also used these recently as cake toppers and served them at parties as an alternative to chips.


All of my kids to my surprise are loving the cereal. I’m not sure whether its just because they are numbers or what but the Peach flavour seems to be a winner. I love the fact it is a cereal low in sodium and sugar and made only with organic ingredients.  We use this as a snack food, I take little containers of numbers with me for baby to snack on.  I have also used it as a number teaching exercise!


My favourite is the cheesy Fiddlesticks.  These a great we can demolish these so fast.  Serve with some dip or yoghurt and some vegies and you have a quick lunch done.   Great to pack in lunch boxes or if you're peckish in the middle of the night to dunk into some hommous.


If you’d like to know more about cooking, recipes and food info for babies and children you can visit Mandy over at  Little People Nutrition. Great website with lots of ideas. You can follow Mandy's facebook page too 


You can check out all the products on the "little bellies" website or on their facebook page
They are found in most the major supermarkets. Ours are in the baby food aisle. 


Insert drum roll here …

The fabulous Little Bellies family are generously giving one of our followers a gift pack of their goodies to try!   
Yay thank you.

All you have to do is enter via the Rafflecopter entry below.   Australian residents only.

Winners will be drawn Saturday 13th July 2013.   


Thursday, May 16, 2013

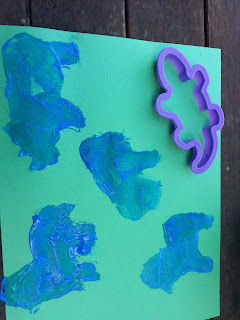
Painting with Cookie Cutters

http://mumstakefive.blogspot.com.au/

Painting with Cookie Cutters 

This is great activity for preschoolers


So much learning is done in this fun activity. 
All you need is paper, paint and cookie cutters.


Preschool paint, stencil paint, toddler, teaching  http://mumstakefive.blogspot.com.au/Sorting skills - Create themed pages "Animals that live in water", "jungle", "night creatures" 


teach preschool, toddler paint, preschool teach http://mumstakefive.blogspot.com.au/Colours - Colours that match the scene, black paper for night, blue for water, green for jungle.


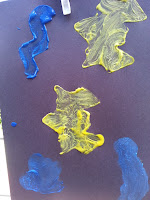
toddler painting, toddler activity, painting for kidsUse different colours for each cookie cutter image. Teach the colour names, mix the colours and create new colours. 


toddler painting, teach kids, painting stencils Imagination - Create stories and scenes. Get your child to build a scene and tell you about it.


Use the cookie cutters in different ways. paint the inside only.  paint around the outside only. dip the edge in paint and make an outline print. Give the image details eg. fish scales, fins and eye. 


Learning to hold the cutter so it doesn't move and what happens if you do.

Learning to paint the inside and not get your other hand in the way is a learning task in itself. 

I helped initially so my son didn't become frustrated and then left him to it. He worked it all out pretty fast and had a great couple of hours.


You could also teach washing skills by getting the kids to wash all the cutters after!  :)